One day a couple of months ago I had a little bit of heavy whipping cream left over after using some for a recipe. I often find that I have heavy whipping cream taking up space in the fridge only to sadly spoil or to find it's way into my coffee.. which is probably a bad choice. I did what any average person with a question does these days: I googled it. I found a little tutorial on how to make butter from heavy whipping cream by shaking it vigorously in a jar for 10 minutes. I tried this jar thing and after about 30 minutes of shaking and a significant amount of arm fatigue I sort of had butter. Which proceeded to spoil the following day.
It was suggested that I try a blender instead (what an ingenious idea!). However we don't have a normal blender. I tried out our immersion blender the next time I had some heavy whipping cream around and with a little more effort than would be needed with a typical blender.. I made butter.
I am now a butter making machine and I would like to share for you my means of making butter. It's shockingly simple. It will save you money. It's probably better for you than many store bought butters. It's fun. And it gives you lots of buttermilk. Who doesn't want lots of buttermilk?
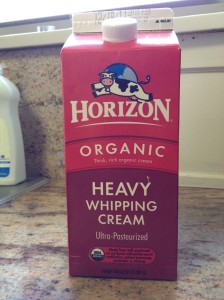
I started with this half gallon of Horizon organic heavy whipping cream that I bought at Costco for $6.99. I made my butter in smaller batches as needed so I cannot attest to the accuracy of this.. but from a bit of Google research it seems that a half gallon of heavy whipping cream will yield 3-4 lbs of butter. Depending on what type of butter you purchase, where you purchase it, and in what quantities your purchase it your actual savings when making your own butter will vary. I had not been purchasing organic butter because we use so much butter.. it was just too costly. This gets me organic butter, in large quantities, for a little more than one package of butter at the co-op.
I poured some into one of the mixing containers that came with my immersion blender.
I started blending it on the highest speed setting.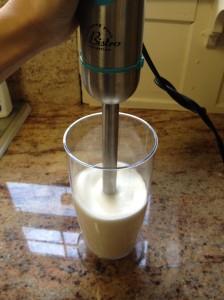
Pretty quickly you'll notice that the cream is doing it's job... it's turning into whipped cream. Keep blending past this point. When using an immersion blender you have to lift it up and down to keep the blended cream circulating.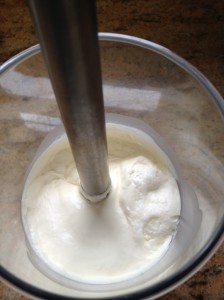
Depending on the speed of your blending apparatus your whipped cream will start to turn a bit chunky and slightly yellow after 5-15 minutes. If you feel like you're getting nowhere it's possible that your cream warmed up too much. Simply place it back into the refrigerator for a bit and try again later.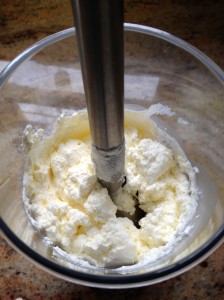
Blend a bit more until you notice a liquid separating from the chunky stuff. The chunks are the butter and the liquid is the buttermilk. My blender starts to give some resistance at this point.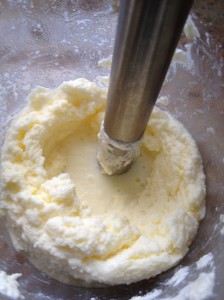
Take a somewhat rigid spatula and press the butter into a big glob.
Switch spatulas when you realize you're using the IKEA spatula that falls apart and gets stuck in the butter chunk.
Pour out the buttermilk into an awaiting receptacle. I use an old honey jar. Try to get as much buttermilk out of the butter as possible by squishing it a bit more. If buttermilk is left in the butter it will spoil quickly.
I prefer to use a clear container so you can see what's going on at this point. This part of the process is called 'washing the butter'. It helps get as much buttermilk out of the butter as possible.
Add some cold water to your container of butter. Use the spatula to press the butter into the sides of the container and fold the butter over and press again. Pour out the water. The butter should stick in the container when you pour and not fall into the sink.
Add cold water again. Notice it is less cloudy but not clear. This means there is still buttermilk in your container. Repeat the washing process.
Repeat the washing process until the water poured out after washing is nearly clear.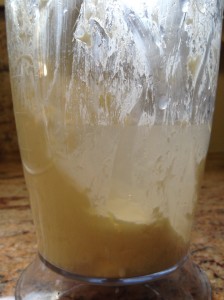
Transfer to the container(s) of your choice. And there you have it! Homemade butter!
You can do plenty of things with your butter. I use it when I bake bread, I put it on bread, I butter pans, I add it to recipes which call for butter. Use your buttermilk for things like buttermilk pancakes, and biscuits, and coffee cake like this!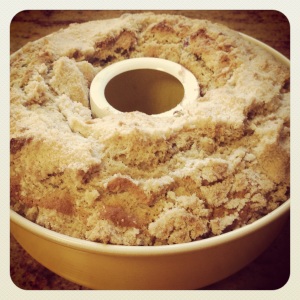
And if you have an 8 month old baby something like this may happen while you're making butter...

I suggest you give butter making a try. Homemade butter smells and tastes better and is much more rewarding to consume.. at least to me. It's one of those things that I never knew was so easy! Like making pie crusts. Or bread. Or rice pudding. Why do people buy those things anyway? So stop buying butter.. and make it! Yay!

Wahoo! Totally trying this.
ReplyDeleteIts lame, but I never even considered whether or not you could make your own butter. Granted, I don't eat much of it, but it sounds fun!
ReplyDeleteVery cool...can't wait to try this!! Nom Nom!
ReplyDeleteHolyhomemadebutter! Thanks for the how-to. I'm going to try this over the weekend. :-)
ReplyDeleteLet me know how it goes! :)
ReplyDeleteyay! :)
ReplyDelete