Showing posts with label recipes. Show all posts

Tuesday, October 23, 2012

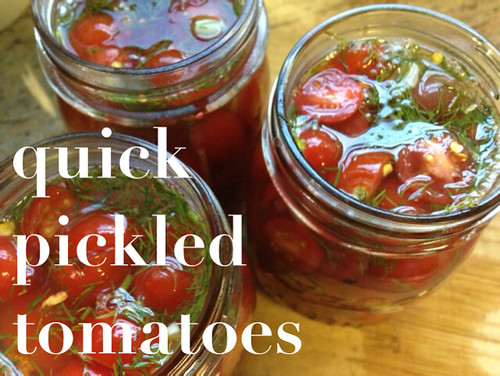
quick pickled tomatoes. { tasty tuesday }

quickpickle

I cannot adequately express to you how many tomatoes we had from our garden this year nor the emotions those tomatoes brought forth. When I noticed there were too many tomato plants growing what did I do? I allowed them all to grow. When I noticed that I'd have 1,000,000,005 tomatoes this year what did I do? I picked every single one. I hate wasting when I grow. So that has left me in somewhat of a panic trying to figure out what to do with all of the tomatoes.

I experienced some wonderful picked vegetables at my CSA's Chef-in-the-Box demonstration. I immediately thought it'd be a good way to use some of my tomatoes but immediately forgot the quick pickle process right after I asked. Oops.

After some searching online I found a few ideas and modified a few things. I had to remove the sugar and increase amounts as I'm dealing with large volumes of tomatoes here. Seriously.

So here it is... a super simple and quick pickle recipe for tiny tomatoes. It's easy, yummy, versatiles, and has a bit of a kick!

You'll need:
1 1/2 c raw apple cider vinegar
1 1/2 c water
8 tsp coarse kosher salt
1 tbsp maple syrup
1 tsp lemon juice
24 oz small tomatoes (cherry, pear, or grape)
1/4 c fresh chopped dill
4 medium thinly sliced garlic cloves
1/2 tsp crushed red pepper flakes


[caption id="" align="aligncenter" width="150"]20121009-194051.jpg Wash the tomatoes and remove the stems.[/caption]

[caption id="" align="aligncenter" width="150"]20121009-194103.jpg Combine apple cider vinegar, water, kosher salt, maple syrup, and lemon juice and heat until salt is dissolved. Set aside and let cool for 25 minutes.[/caption]

[caption id="" align="aligncenter" width="150"]20121009-194109.jpg Cut the tomatoes in half and put in a large bowl.[/caption]

[caption id="" align="aligncenter" width="150"]20121009-194114.jpg Add the dill, garlic, red pepper flakes and mix.[/caption]

[caption id="" align="aligncenter" width="150"]20121009-194120.jpg Put the mixture into whatever container you plan to use. This recipe fits perfectly into three mason jars.[/caption]

[caption id="" align="aligncenter" width="150"]20121009-194125.jpg Cover the tomatoes with the cider vinegar mixture and let sit open for a few hours.[/caption]

Refrigerate for up to three weeks and use however you wish!


Some suggestions for use:
As a side
On top of a salad
On chips or crackers, along with sour cream (would be a great hors d'oeuvre or snack for guests)
Give as a hostess gift

Tuesday, October 16, 2012

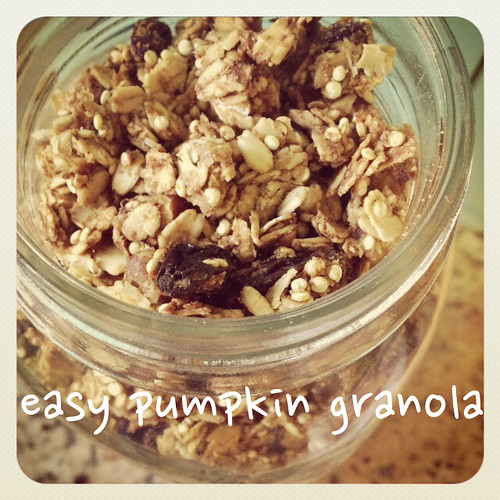
easy pumpkin granola. { tasty tuesday }

I've been meaning to make granola for months and months and months. I've seen many more granola recipes pinned on Pinterest lately - I assume partly due to the cooler weather and a desire for us to use our ovens and due to an increase in anything that can be made with pumpkin.

pumpkingranola

This was easy, pumpkiny, and yummy.

What you'll need:
2 cups rolled oats
1/4 cup uncooked quinoa
1/4 cup flaxseed meal
1/2 cup chopped pecans (or chopped not of your choice)
1/2 cup raisins (or dried berry of your choice)
1/4 cup maple syrup (or raw honey)
1/4 cup (heaping) pumpkin puree
1/2 tsp vanilla extract
pinch or more of:
nutmeg
cinnamon
allspice
cloves
sea salt

Preheat your oven to 325 F.

Line a baking sheet with parchment paper (because that makes making almost everything a million times easier), spread out the oats and the quinoa and toast for 10-15 minutes, stirring it every 5 minutes or so.

In a blow combine the flaxseed, pecans, and raisins. When the oats and quinoa are finished add them to the bowl and toss. Reduce the oven to 300 F.

In a smaller bowl combine the maple syrup, pumpkin, vanilla, and spices. Mix this together and pour it over the dry mixture.

Spread this over the same parchment paper lined baking sheet (because wasting parchment paper is silly) and cook for 35 minutes.

See how simple that is? :)

Have you made your own granola? I can't believe I'm only just doing it now. Olive really likes it, which is great seeing as there are so many good things crammed in there (oat, quinoa, flax, oh my!).

Tuesday, June 26, 2012

gluten, sugar, dairy free rhubarb crisp.

Oh my goodness. You have to try this.

I'm not too familiar with rhubarb but Tyler really likes it. I had some strawberry rhubarb pie at a wedding a few weeks ago and really enjoyed it so when we received a little bunch of rhubarb in our CSA share this week I thought I'd make a crisp (I haven't delved into the world of gluten free pies quite yet). Though I've never made a crisp before, let alone a gluten and sugar free crisp.

Yesterday at the farmer's market I bought a second little bunch - I wasn't sure how much I would need but I thought I could at least make two batches if I had enough..

I started with a recipe I found via Pinterest. It's from Quaker Oats circa 1990 something. I naturally had to modify quite a few things to make it fit my needs and was very pleased with the results! I confirmed this with Tyler who agreed that he would be happy to eat it again. So that's a good sign.

You'll need:
3 cups of chopped rhubarb
2 cups of chopped apples with peels removed (or strawberries.. or whatever)
3 tablespoons cornstarch
1/3 cup agave nectar
1/3 cup maple syrup
1 1/4 cup oats
1/2 cup coconut oil (or butter)
1/3 cup almond flour
1/4 cup maple syrup
1 teaspoon ground cinnamon

Preheat oven to 350.

Roughly chop the rhubarb:
20120626-224602.jpg

And the apple (or whatever):
20120626-224557.jpg

Combine in a bowl and coat with the cornstarch:
20120626-224608.jpg

Add agave & maple and stir to coat until you see little to no dry cornstarch:
20120626-224613.jpg

Place mixture in a baking dish (I used a rectangular one, square would probably be better but I don't have one!):
20120626-224628.jpg

In the same bowl (I'm a fan of making as little mess as possible) combine the oats, coconut oil, almond flour, maple syrup, cinnamon, and stir to combine:
20120626-224621.jpg

With your hands drop the topping over the rhubarb mixture:
20120626-224635.jpg

Bake for 40 minutes... and yum! :)
20120626-224640.jpg

This makes 4 big servings... or maybe 6-8 smallish. But I'm a big serving kind of girl. Feel free to top with ice cream, whipped cream, or ice milk!

The whole thing is about 2594 calories - so that's 432 calories if you divide it into 6 servings. So.. maybe do that. :)

Sound yummy? Why don't you pin it?! :)

easy summer on the go lunch.. in a mason jar!

A couple of weeks ago I tried to make a veg burger from a recipe I found on Pinterest. I did a ton of substations, because I usually do, and also to make it gluten and sugar free. The consistency did quite work right for frying into a patty. I put it on lettuce and we ate it sort of roll form. I rolled up the leftovers and lettuce and we ate it for lunch on our road trip to Washington.

While making my meal list last week I thought I would try something similar but modify it to be more friendly for our family. What I came up with is gluten and sugar free, mostly fresh and local, healthy, very easy to make, portable, perfect for summer when don't want to use your stove or oven, and is about 280 calories per serving.

I've called it Sweet Jar Lunch, that is sort for Sweet Potato and Cannellini Bean Layered Lunch Thing in a Mason Jar. This recipe makes four jars.

Sweet Potato & Cannellini Bean Thing:
20120626-122125.jpg

Avocado "Spread":
20120626-122133.jpg

Chopped Tomatoes:
20120626-122138.jpg

Lettuce Mix:
20120626-122145.jpg

Mustard:
20120626-122151.jpg

20120626-122202.jpg

20120626-122209.jpg

Layers, from top to bottom:
1: Shredded Lettuce Mix, about 2 cups
2: Chopped Tomatoes, I happened to have 5 cherry tomatoes waiting to be used.
3: Avocado "Spread" - 1 avocado, some green onion, 2 small fresh onions, 1 tsp lemon juice, dash of sea salt - all smushed together.
4: 1 Tbsp Mustard (per jar)
5: Sweet Potato & Cannellini Bean Thing - 1 medium baked sweet potato (skin removed), 2 cans cannellini beans (rinsed & drained), 3 Tbsp almond flour, 2 Tbsp honey, 2 Tbsp peanut butter (I would have preferred almond butter but didn't have enough), a dash of fresh ground black pepper - all mixed and mushed together using a potato masher.

I'm planning to make this every couple of weeks this summer as we do not have air conditioning so the thought of a good meal without the use of the stove or oven is very attractive. Throw a lid on the jar and it's a perfect meal for a road trip, picnic, or day at the beach!

I'm expecting this to be popular on Pinterest. Because its yummy, fast, easy.. and in a jar. ;) So.. pin it if you please!

Friday, May 4, 2012

overnight oats.

I've seen photos of overnight oats on Pinterest a few times. I've also seen photos of overnight chia puddings and things. And I've skimmed those recipes and then without much thought or plan made some the other night after realizing we didn't have much on hand for the following morning's breakfast.

As usual I didn't measure anything. I've done this three times so far and while each one was different each one was super super yummy.

Combine in a sealable bowl or jar:
(all of these measurements are complete guesses, just feel it out as you go as far as the texture you're looking for)

1/2 cup oats
1/3 cup almond milk
1/3 cup heavy cream (I'm eager to use yogurt but I haven't made any recently)
Splash of maple syrup or other sweetener
1 tablespoon chia seeds
1 tablespoon unsweetened dried coconut
Fruit! (the first time I used handed grapes and diced apples, second time sliced grapes and diced peaches, third time diced peaches and apples)

Mix, cover, refrigerate overnight. Then enjoy in the morning!!! :)


20120504-144831.jpg

20120504-144841.jpg

Thursday, April 19, 2012

gluten and sugar free pumpkin cookies.

I whipped up some "cookies" last night and thought I would share. :)

- half of a can of pumpkin purée
- 2 eggs
- 4 tablespoons almond butter
- 3 tablespoons almond flour
- splash of vanilla
- pinch of cinnamon
- dash of nutmeg
- sprinkle of cloves

Preheat oven to 350
Mix all ingredients until smooth
Plop onto parchment lined baking sheet
Bake for 14 minutes (or so.. Our oven isn't overly accurate)


20120419-163027.jpg

20120419-163038.jpg


We enjoyed some last night with whipped coconut, a drizzle of maple syrup, and a sprinkle of shredded coconut on top. :)

20120419-163045.jpg

Saturday, April 14, 2012

stuffed zucchini and riced cauliflower.

I don't usually blog when I cook. I cook something new 4-5 times a week. Blogging all of that would be way too time consuming! But this got a lot of attention, comments, and questions.

Riced cauliflower:

A head of cauliflower processed in a food processor, about the size of rice.

Cook the cauliflower. I put it in a pan and sautéed it in coconut oil and then put it in the oven with the zucchini for five minutes.

You can steam it, sauté it, microwave it.. Whatever.

It's a really great alternative to rice. A much better texture and flavor in my opinion.

Stuffed Zucchini:

3 medium zucchini
1/2 red bell pepper, chopped
Small onion, chopped
Thyme
1/2 teaspoon Curry powder
Salt
Pepper
2 Tablespoons sour cream
Parmesan cheese

Preheat oven to 400 degrees.
Brown the onion in a pan. Add curry powder and leave on heat for 30 more seconds.
Meanwhile cut the zucchini lengthwise and scoop out the pulp.
Chop the pulp and put it in a bowl.
Add the chopped red pepper, thyme, salt, pepper, sour cream, and the onions when they are done.
Put the prepared zucchini boats into a oiled/buttered baking dish.
Fill the zucchini with the mixture and sprinkle Parmesan cheese on top.
Bake for 20 minutes.

Yum!


20120415-001032.jpg

Saturday, March 24, 2012

grain and sugar free pumpkin pancakes.

We had grain free paleo pancakes for breakfast this morning. I referenced a recipe but switched up a few things and I am really happy with the result. Kind of like having pumpkin pie for breakfast!!

What you'll need:
Two eggs, beaten
1/2 cup of canned or cooked pumpkin
1/2 cup of almond butter
1/2 Tablespoon almond milk
1 teaspoon maple syrup
1/2 teaspoon honey
1/2 teaspoon cinnamon
Pinch of nutmeg
Pinch of cloves
Pinch of allspice

Combine all ingredients until smooth


20120324-195032.jpg

Put about 1/4 cup into a pan with coconut oil or butter and cook a couple of minutes per side. Just wait for the bubbles to stop like "normal" pancakes.


20120324-195211.jpg

Enjoy! :)

Wednesday, March 21, 2012

homemade ricotta cheese.

Making ricotta at home is so fast and easy! And less expensive than store bought ricotta as well.

There are many many ways to make ricotta cheese but this is the method that I use and like.

You'll need:
A pot
A strainer
Cheesecloth
2 qts milk
1 cup heavy cream
2 tablespoons vinegar

Combine the milk, cream, and vinegar in the pot and bring to a boil for a few minutes. You'll see the milk curdling as it boils. Let it cool and then strain. Squeeze to get the excess liquid out.

You can strain it warm if you want warm ricotta but it will curdle a bit more as it cools so you'll yield a little more that way.

You can use the leftover whey in baked goods or as a replacement for water in soups.

If the mixture is boiling add a bit more vinegar until you see it curdle.

You can very easily half or double this recipe. As is it yields about three cups of ricotta. But I snack as I strain it do I could be wrong. ;)

Enjoy! It's soooo yummy!


20120321-171935.jpg

Do you make ricotta? If so, how?

Saturday, March 17, 2012

gluten & sugar free mug cake.

Everyone seems to be making mug cakes these days. I really never paid much attention since they seem to involve things like gluten and sugar and other bad things.

On a whim and after about two seconds of thought I threw some things into a mug and had myself a yummy mug cake!


20120317-221142.jpg

A lump of butter. Possibly two tablespoons (I make my own butter and I typically don't measure things so...)
Three tablespoons of oat flour
Two teaspoons of baking cocoa
One teaspoon of maple syrup
1/2 teaspoon of honey

Melt the butter in the mug you're using. Add each ingredient above while stirring with a fork.
Microwave for 1 minute and 15 seconds.

It didn't rise too much but it's dense and rich so it was just enough. :)
It bubbled and was still bubbling when I took it out. That left it with a neat honeycomb pattern on top.

Enjoy! :)

Saturday, March 3, 2012

wheat free teething biscuits.

I just whipped up Olive some teething biscuits tonight while making dinner, sugar free kheer, and vegetable stock. It was an eventful evening in the kitchen. Pretty steamy, too!

I recently started using Pinterest last week. I was largely against it for a while because I thought it would be another unnecessary time consuming social internet thing blah blah. I've had an invite for a while and decided to at least peek. To my delight I realized I could use it to "remember" things instead of having a billion bookmarks or tabs open. (Honestly, I don't even bookmark things.. I'm a billion tab person. So many tabs. It's so unhealthy.) Duh... you "pin" things to "boards" - why didn't I put that together when I first heard of it? So I transferred a lot of my taps to pins and did a little more searching for things I can eat on my elimination diet, things for Olive, and more! So helpful!

I stumbled upon a few recipes for teething biscuits and thought I'd post a quick little ditty of what I did since I've already had a few inquiries. There are a bunch of different recipes out there but they're all pretty similar. I basically threw everything in without measuring.

Pre-heat oven to 350 degrees.
Mix together 1 cup of oatmeal infant cereal (I'm going to try grinding my own oats next time) and 1 cup of oat flour.
In another bowl combine one very ripe banana (mine was an overripe frozen banana), about 1.5 Tbsp of canola oil (I never measure anything), and a splash of water. Mix until combined and then add to the dry ingredients.
Mix together until combined, add more water if necessary, avoid stickiness if possible.
Roll out (I smushed with my hands - I love shortcuts) onto a floured surface (I used almond flour) until is about 1/4 inch thick and then cut into shapes (I made rectangles (sort of) with a pizza cutter).
Place the uncooked biscuits onto parchment paper on a cookie sheet and bake for 12-15 minutes.


20120303-193947.jpg

Fresh, healthy, allergen free, preservative free, and full of yummy teething biscuits! Play around with the fruit or vegetable but plan to adjust your water according to how moist your fruit or vegetable is.

Enjoy! :)

Friday, March 2, 2012

homemade yogurt.

I'm sitting here with a big bowl of homemade yogurt with local raw honey mixed in.. So I thought it would be a good time to type of a post about how I made the yogurt. Especially since I decided to scratch tonight's to do list. Just not feeling like doing laundry and cleaning things.

We recently started getting a lot of milk thanks to WIC. We don't really drink much milk so it's been interesting. We don't have to accept it everything that our monthly checks are for but I would like to try to put it all to good use if I can. I've been making sugar free kheer way too often. Last weekend I gave yogurt a try and I was so impressed at how easy it was and how yummy it is!

I started by googling how to make yogurt. I came up with quite a few different strategies and kept searching until I found one that would work for me, at Kitchen Stewardship. I had to reread the post a few times.. it's really long and wordy.. so I'm reposting everything that I did here for both future reference for myself and for you. :)

What you'll need:
Glass containers with lids
A large pot (that will hold your glass jars)
A dish cloth
Milk (any type you like)
Starter yogurt (2 Tbsp for every 4 cups of milk) (with live active cultures and no extra ingredients)
Thermometer
Spoon
Towels
Timer or clock

I started by sterilize four large glass canning jars along with their lids, a thermometer, and a spoon in a pressure cooker.

After letting them air dry I put the dish cloth in the bottom of the pressure cooker and put the clean jars on top.  I added approximately three cups of milk into each jar (I used a mixture of whole and 2% milk).

20120226-212250.jpg

I did my best to secure the sterilized thermometer to one of the jars and I filled the pressure cooker with warm water to about the same level as the milk.

I turned the burner to medium, sealed the lid (with the weight off) and waited.  Every 15 minutes or so I peeked in.

Your goal is to heat the milk to 185 degrees.

20120226-212308.jpg

Once it reaches 185 degrees you have successfully sterilized the milk.  This would be a good time to take your starter yogurt out of the refrigerator so it isn't too chilly when you mix it in.

Put the lids on the jars.

After sterilizing the milk it needs to cool to somewhere between 90-110 degrees for the incubation period.  My thermometer does not go that low so I shot for a bit under the lowest mark of 120.

There are many options available for cooling the milk.  I put the jars in the sink and then added tap water.  Unfortunately this cracked one of the jars which is why the water in the photo below looks cloudy.  Next time I will simply let the jars sit on the counter.  It will be a longer wait but I won't risk cracking a jar.

20120226-212316.jpg

Make sure you keep the thermometer clean as you move it around during these steps.  Check the temperature of the milk as often as you see fit.

When it reaches the desired temperature (between 90 and 110 degrees) add the starter yogurt.  Since I lost one jar I was down to three (9 cups of milk, so I added about 1.5 Tbsp of yogurt to each jar).  Gently add the yogurt and stir.

Incubate the milk/yogurt mixture between 90 and 120 degrees anywhere from 4-24 hours.

I first put the pressure cooker full of boiling water into the oven on top of a towel. The jars were outside of the canner right next to it, wrapped up in the towels.  Every so often I switched the pressure canner out with a tea pot in order to keep warm water inside.  Keep in mind that every time you open the door or check the temperature you will be losing heat.  This is one of a number of ways to incubate the yogurt.

Unfortunately I realized that I needed the oven to make dinner so I had to make a quick switch, which is generally not preferred.. you should keep the yogurt as still as possible during incubation as the bacteria multiply.

20120226-212324.jpg

I grabbed our cooler, lined it with a towel, added the tea pot of boiling water, nestled the jars next to the tea pot and covered them with a towel before closing the lid.

20120226-212331.jpg

I let the yogurt incubate for seven hours.  After seven hours I had three jars of yogurt!

20120226-212341.jpg

The separation is normal.. just like you would find in most store bought yogurt. Simply mix it together if you like.  Or reserve it for another use.

20120226-212349.jpg

Place your jars in the freezer for an hour to quickly cool the yogurt and get a sturdier texture.

Overall it was a really simple process.  The incubation period was slightly complicated due to having to move everything. Bad planning on my part.  I hope to not break a jar next time.  Clean up is a breeze, your yogurt is already in the containers that you'll store it in.

The temperature to which you cool the milk and your length of incubation both influence the taste and texture of the yogurt.  Play around with it until you get what you like.  Shorter incubation will be sweeter.  Longer incubation will have less lactose.

Thanks to Kitchen Stewardship for the tutorial.  :)

Wednesday, February 29, 2012

first birthday cake { grain & sugar free raw carrot }

Keeping in line with my elimination diet and because no one really needs sugar, I decided to make Olive a sugar free birthday cake. Even before committing to my diet I was planning to make her something sugar free.

20120228-221043.jpg

After skimming some recipes online I found a few grain free and raw cakes that seemed perfect. Raw food is great because it's still in its most natural form.. so none of the nutrients have been cooked out our altered. Grains aren't really all that necessary for us to eat.. they're pretty processed and don't offer that many good things compared to something like fresh vegetables. I wouldn't say they're harmful but I don't really think we need them.

So why not make a cake that is enjoyable and nutritious and not going to make a baby previously unexposed to sugar go crazy on already crazy day?!

I settled on a recipe from A Gluten-Free Vegan Mom Who Knows but I changed a few things and used a different frosting. Olive loved the cake and so did I. I loved it so much that I'm making it for my birthday in a couple of weeks! :) I can't wait. And then I'm going to make one for... St. Patrick's Day. And... Easter. And... Saturday. And... yep.

The original recipe calls for tahini. I didn't want to buy a $9 jar of tahini so I used almond butter instead. I also did not include honey and I reduced the amount of walnuts (both due to Olive's age).

Here's what I used:
1 cup raisins (soaked until plump and then chopped in a food processor)
2 large carrots (finely grated)
3/4 cups raw walnuts (finely chopped in a food processor)
heaping 1/2 cup finely shredded coconut (ground in a food processor if not finely shredded)
1 tablespoon almond butter
1/4 cup maple syrup
1 teaspoon vanilla extract
1/2 teaspoon of cinnamon
1/2 teaspoon of nutmeg
1/2 teaspoon of ground cloves

In a bowl combine all ingredients and mix well.

I was going to put the mixture into a tart pan to mold it but, as you can see from the photos, it makes a rather small cake. It wasn't nearly enough to fill the tart pan. It's pretty moldable though so I hand made a circle on a small plate. And I let it chill until it was cake time.

20120228-221026.jpg

(I'm impressed by my handmade cake circle)

And because it's raw... viola! You're done! :)

The frosting I made was not vegan. I didn't follow the frosting recipe that accompanies the original cake recipe because I didn't want to add to Olive's nut intake that day and there were a few more things that I would need to buy. I went with a sugar free cream cheese frosting that I made up. Luckily it worked out because I didn't test it.

Frosting:
1 8oz package of cream cheese
4 Tablespoons of softened butter
1/4 maple syrup
2 teaspoons of vanilla

Whip the butter and cream cheese together, preferably with a stand or hand mixer. Add vanilla and maple syrup until incorporated. Stick your finger in and enjoy. :) And then put whatever is left on the cake.

The frosting is a little difficult to spread without the cake getting stuck to it so I basically just globbed it on.

20120228-221043.jpg

Olive spent about 30 minutes with her cake. She was pretty careful with it at first and eventually grabbed a handful. She also graciously fed some to me too. We enjoyed little bits of cake with our meals over the next few days.

20120228-221106.jpg

20120228-221127.jpg

What's great about this cake is that we were able to eat it with our meals over the next few days.. :) It's not like a sweet desert that we need to ration. We didn't need to be careful about giving Olive too much sugar or something. It's all yummy and healthy ingredients so I just put a little on her plate during lunch and dinner. :)

Tip - Make sure you're using pure maple syrup.. nothing with added sugar, obviously.

You can see the original recipe here.

Let me know what you think if you end up making it. It's sooooooooooo yummy. :)

Friday, February 24, 2012

sugar free kheer.

This recipe does not fit very well into the Paleo-ish portion of my elimination diet but it is sugar free, which is most important. We have a bunch of rice right now so why not use it.. I'm not making kheer for nutrition purposes, it is purely for pleasure.

Rice pudding has always been a favorite of mine. I always used to order it at diners and breakfast shops when I was a kid. As a special treat I would sometimes have store bought rice pudding at home.

I began eating more "internationally" after leaving home for college. I developed a love of many types of food, especially Indian. Imagine my delight when I tasted kheer for the first time. :) All of the pleasures of rice pudding... And more!

I discovered a kheer recipe around a year ago and began frequently making it at home. This was very exciting for me though slightly disappointing.. It really is so easy to make - I wish I would have known how to make it myself when I was younger or that my parents would have known how to make it for me. It's surely more economical, more tasty, and much healthier. But alas.. I will look to the future and dream of all of the homemade kheer I will make for Olive (and any subsequent Fialas). :)

Typically kheer has a decent amount of sugar in it so I sought out to do some experimenting. I got lucky and made a super yummy batch on my first try.

What you'll need:
- 8 cups of milk (whole, 2%, skim.. whatever)
- 3 cardamom pods
- 3/4 cup of basmati rice
- 1/3 cup of maple syrup
- 1 tbsp-ish of honey

Heat milk and smashed cardamom pods in a heavy bottom pot until bubbling. Heat very slowly - be patient so it does not burn on the bottom.


20120224-225943.jpg

Simmer for approximately an hour or until milk has reduced by about half.

Add the rice and stir. Simmer for another 30 minutes, stirring occasionally.

Add the maple syrup and honey and continue to simmer for another 10-15 minutes until rice is tender. Don't overlook the rice.


20120224-230317.jpg


20120224-230330.jpg

Enjoy your kheer warm straight from the pot or let it cool and chill it. Along the way you can add raisins, a cinnamon stick, unsweetened shredded coconut, or anything else you would like. :)

I enjoyed a small dish of warm kheer with cinnamon and shredded coconut sprinkled on top. Yum!


20120224-230612.jpg

Kheer is a staple in our house and I'm so glad that I can still enjoy it sugar free! I honestly think I like it better this way. :)

What was one of your favorite special childhood snacks? Do you still enjoy it?